
20 Surprising Science Experiments with Salt (Kids Will Love Them)
- October 23, 2020
- Science Experiments
Our houses have many ingredients that serves as a key component for performing a lot many simple science experiments.
I am sure, you would never imagine how useful SALT can be around your home to engage your kids with fun learning and to explore the world of science around you and your kids.
Science Experiments with Salt

All the experiments are super fun, simple, easy to do, no messy, easy to set up, and especially unique science activities. Here we go!
1. Salt Painting Science Experiment

If you are looking for a simple science and art project , then this awesome salt painting science experiment is a great way to explore about simple concepts of science such as absorption. Pre-schoolers and home schoolers find this experiment a great way to learn science concepts.
Find more details of this amazing science experiment here: Salt Painting Science Experiment
2. Desalinization Science Experiment

The word ‘Desalinisation’ is an intimidating word for young children. But believe me, with this spectacular science experiment kids easily learn marine biology hands-on.
Supplies and instructions for desalinisation are found here: Desalinisation Science Experiment
3. Floating Egg Science Experiment

What happens to an egg placed in the salt water? Did you know that an egg can be floated in the water? Simple salt water experiment to teach kids about density and fresh water in a fun and entertaining way. Awesome kitchen science experiment for children of grades 1-5.
Are you interested in learning the complete instructions of the experiment? Click on Floating Egg Science Experiment
4. Make Ice-Cream in a Bag Science Activity

Kids will love to make their own ice creams and end up with a great tasting desert while learning a lot of chemistry science . This is such an awesome kitchen science experiment that finishes in 10 minutes . How cool is it!!
Engage your kids in making ice cream with complete instructions. Find details here: Make Ice-Cream in a Bag Science Activity
5. Melting Ice Salt Science Experiment

Children will learn how salt melts ice with this super cool science activity. It seems simple and easy but encourage kids to explore a lot of science.
Do not miss to check out Melting Ice Salt Science Experiment for more information in detail.
6. Grow Salt Crystals Science Activity

Growing salt crystals is a simple science experiment that is popular to make kids learn about chemical reactions involved to form crystals. Fun and engaging Easter Science Activity! Kids will have a ton of fun while learning how to grow salt crystals at the same time.
Get more details of the experiment here: Grow Salt Crystals Science Activity
7 . Ice and Salt Science Experiment

Here is an awesome science activity fills the days of the children in grades 1-7 with some simple science concepts. It’s a fun STEAM (science, technology, engineering, art, Math) activity for kids.
Check out here, Ice and Salt Science Experiment
8. Sticky Ice Science Experiment

This kid’s friendly science experiment with ice is simply too cool, quick, easy, and little magical. Kids will get to learn about freezing point of water and its effects on salt in a fun way. Challenge your children to lift the ice cube just using a thread!
Click here Sticky Ice Science Experiment to learn full description of this super classic science experiment.
9. Egg Geodes Science Experiment

Fun and successful science fair project with egg geodes make the children sharp in developing their critical thinking and questioning skills leaving a wow factor on their faces.
Want to give it a try!? Click on Egg Geodes Science Experiment .
10. Homemade Slushy Drink with Ice and Salt Experiment

Let your kids learn about freezing and melting points while having fun in making homemade slushy drink on their own. This simple science activity offers a great alternate method of making ice cream and cooling drinks very quickly. Sounds entertaining!!
Get the complete description about this classic science experiment here: Homemade Slushy Drink with Ice and Salt Experiment
11. Salt Vibrations STEAM Activity

Here on it is not intimidating to understand the concept of sounds. Easy and fun science STEAM activity that teaches kids about sounds caused by vibrations. In fact, kids are allowed to enjoy this demonstration that actually shows kids the sound waves in action. Click on Salt Vibrations STEAM Activity
12. Salt Water Experiment Ocean Science

A terrific salt science experiment for pre-schoolers! An awesome kitchen science experiment to teach kids about density of salt water versus fresh water. This experiment offers great time to learn about the difference between fresh river water and salty ocean water. What a cool activity!
Click on Salt Water Experiment Ocean Science to find more details
13. Growing Gummy Bears Science Experiment

Have you ever wondered of watching growing gummy bears? Do you think it is hard to witness? Absolutely not! Do this simple science experiment to show how this common kitchen hold mineral effects gummy bears?
Check out here to find simple step-by-step information and instructions: Growing Gummy Bears Science Experiment
1 4 . Rainbow Salt Circuit Science Experiment

Creating an electric circuit using common kitchen hold mineral i.e. salt is an amazing experience for the kids. A great hands-on examination on circuits making kids scientific knowledge on power and circuits little more interesting and exciting.
Are you interested in creating your own salt circuit with water? Then click on Rainbow Salt Circuit Science Experiment
15. Cleaning Pennies Science Experiment

All the kids love to play with pennies and while playing they even observed at times some pennies look dull and some other look bright. Just remind your children about this and ask them to guess what the reason behind that is. Let them explain their versions and then explain them about this cool science experiment. They love to do this hands-on activity to watch the magical results of cleaning pennies. Just browse Cleaning Pennies Science Experiment
16. Salt Pendulum Science Experiment

Salt pendulum is a fun art and science fair project for kids of all ages. Let your kids explore the science behind changing times and pendulums hands-on. While investigating the experiment ask your child to predict the time according to the movements of pendulums and predict what impacts time change. Also help them to understand the concept by explaining how salt effects this experiment in a fun way.
Find more details of the experiment here: Salt Pendulum Science Experiment
17. Popcorn and Salt Science Experiment

Let your kiddos think about their own scientific thought process with this easy and simple science activity to do with salt and popcorns. Using just three ingredients you can bring a lot of change in your child’s scientific knowledge. Easy to set up experiment with great results, highlights the difference between mass and volume using kid’s most favourite snack.
Are you ready to experiment with popcorns and salt : Popcorn and Salt Science Experiment
18. Lava Lamp Cool Science Experiment

An excellent way to explore density of liquids using simple ingredients you have right in your kitchen. Fun way to explore density of liquids and great opportunity to practice mixing colors. Besides, this is an easy going science and sensory play experiment as it makes children much more excited and attentive to study the simple science concepts using salt.
Click on Lava Lamp Cool Science Experiment for more information.
19. Static Electricity Balloon and Salt and Pepper Experiment

Children might have observed a balloon sticking to something like hair strands, comb, salt, etc. Throw a question to your children on the magical science involved in this process of sticking to things. Static Electricity Balloon and Salt and Pepper experiment is all about explaining static electricity in a fun way. Isn’t it excited? Best and simple science experiment for your elementary children : Static Electricity Balloon and Salt and Pepper Experiment
20. Solid-Solid Separation science Experiment

An amazing easy fun science activity that teaches kids to understand about three science concepts i.e. evaporation, sedimentation, and filtration. How amazing is it to explain the three main science concepts while performing a single science investigation.
Click on Solid-Solid Separation science Experiment
So, here are the simple and easy science experiments to do with common kitchen hold mineral, salt. There is a lot of science involved in these super cool experiments that will surely amaze you and your kids. Simple science experiments that everyone will love! Fun and fascinating experiments for toddlers , pre-schoolers, and even some are perfect for older kids. Have a look and enjoy experimenting with salt. Happy Experimenting!!

Leave a Reply Cancel Reply
Your email address will not be published. Required fields are marked *
Name *
Email *
Add Comment *
Save my name, email, and website in this browser for the next time I comment.
Post Comment
Get Your ALL ACCESS Shop Pass here →
Salt Water Density Experiment
Can you make a fresh egg float in water? What will happen to an egg in a saturated solution of salt water? Will an egg float or sink in salt water? What is density? What is buoyancy? There are many questions and hypotheses (predictions) to make with this easy salt water experiment, and you can learn about it all with just water, salt, and eggs! Check out all our classic science experiments for more great ideas!

SALT WATER DENSITY EXPERIMENT
Let’s get ready to investigate! Head to the kitchen, open the pantry, and be prepared to get a little salty. And if you are curious about the rubber egg experiment in the video, click here .
YOU WILL NEED:
- 2 Tall glasses big enough to hold an egg
SALT WATER EXPERIMENT SET UP:
STEP 1: Start by filling one glass about 2/3 of the way full with water. Ask the kids what will happen if you carefully drop an egg into the glass of water. Now go ahead and do it!

STEP 2: In the other glass, fill to the same height with water. Now stir in 3 tablespoons of salt. Mix well to dissolve the salt! Ask the kids what they think will happen this time and demonstrate!
TIP: Now’s a great time to talk about mixtures. By combining salt and water, you are making a mixture, an important science concept ( Grab a free printable list of science words )!
A mixture is a material made up of two or more substances mixed together. No chemical reaction takes place, and you can separate the substances in the mixture. You can have a mixture of liquids, solids, or gases.

The second egg should float due to the water’s density change!

SALT WATER DENSITY IN THE CLASSROOM
Kids can easily experiment with different objects from around the room. Small plastic items will work best with the measurements of salt and water provided.
If the item still sinks in the salt water, ask the kids what they think! Should they add more salt? Have each kid contribute an item to the experiment!
This is a great experiment to add to your ocean science lesson plans because the ocean is salty!
So many great saltwater density questions:
- Do you float better in salt water?
- What about some of the biggest mammals on earth that float easily in the ocean?
- Does the density of the saltwater play a role?
Why is the ocean salty? The simple answer is that the salt comes from the rocks on the land that has been broken down by erosion and is carries by streams to the ocean.

WHAT IS DENSITY?
Why do some objects sink while another object floats? An object sinks because it is denser or heavier than water and vice versa. Our sink and float experiment is another exciting way to look at items that might surprise you using only water.
Big items that feel light, like a ping pong ball, are less dense than smaller items that feel heavy, like a gold ring. When added to water, objects denser than water sink, and those less dense than water float. Hollow things often float as air is less dense than water. Learn more about what is density.
You can experiment with many objects that sink and float in water, but what happens when you add salt to the water? Can you change whether the object, like the egg, still sinks?
How does salt affect the density of water?
Adding salt to water densifies it. As the salt dissolves in the water, it adds mass (more weight to the water). This densifies the water and allows more objects to float on the surface that would sink in fresh water. This is an example of a physical change !
Do objects float better in saltwater or freshwater?
What other items can you find to test? Most items will generally float in this salt water experiment even if they sink in freshwater. Just look at the egg!
CHECK OUT MORE SIMPLE SCIENCE IDEAS
- Sink the Boat Buoyancy Challenge
- Freezing Point of Water
- Frost on a Can (not just for winter!)
- Sink or Float Experiment
- Do Oranges Sink or Float?
- What Dissolves in Water?

Turn It Into A Science Fair Project
Science projects are an excellent way for older kids to show what they know about science. They can also be used in all sorts of environments, including classrooms and groups.
Kids can take everything they have learned about using the scientific method , stating a hypothesis, choosing variables , making observations , and analyzing and presenting data.
Want to turn one of these experiments into an awesome science fair project? Check out these helpful resources.
- Science Project Tips From A Teacher
- Science Fair Board Ideas
- Easy Science Fair Projects
Helpful Science Resources To Get You Started
Here are a few resources that will help you introduce science more effectively to your kiddos or students and feel confident yourself when presenting materials. You’ll find helpful free printables throughout.
- Best Science Practices (as it relates to the scientific method)
- Science Vocabulary
- 8 Science Books for Kids
- All About Scientists
- Free Science Worksheets
- Science Supplies List
- Science Tools for Kids
- Scientific Method for Kids
- Citizen Science Guide
- Join us in the Club
Printable Science Projects For Kids
If you’re looking to grab all of our printable science projects in one convenient place plus exclusive worksheets and bonuses like a STEAM Project pack, our Science Project Pack is what you need! Over 300+ Pages!
- 90+ classic science activities with journal pages, supply lists, set up and process, and science information. NEW! Activity-specific observation pages!
- Best science practices posters and our original science method process folders for extra alternatives!
- Be a Collector activities pack introduces kids to the world of making collections through the eyes of a scientist. What will they collect first?
- Know the Words Science vocabulary pack includes flashcards, crosswords, and word searches that illuminate keywords in the experiments!
- My science journal writing prompts explore what it means to be a scientist!!
- Bonus STEAM Project Pack: Art meets science with doable projects!
- Bonus Quick Grab Packs for Biology, Earth Science, Chemistry, and Physics
15 Comments
When I click the link to go to your blog from my email, a virus (weird website) keeps popping up. I like your blog. But you may want to check into the virus.
I think Liam’s explanation of water density is perfect – smart kid! These projects are a perfect way to *show* kids the difference, instead of just trying to explain it to them (like you said, nearly impossibly for preschoolers!)
I can see salt water being a big hit around here for experimenting! This looks so fun! Pinning for the future!
Lots of stirring but lots of interesting fun! Thanks for pinning!
Thanks Emma! He’s a smart cookie and likes to see things too understand! Not big on listening a whole bunch just yet 😉
Thanks I will look and see what I can see! Glad you like it!
Very good post. I absolutely love this site. Continue the good work!
I like this experiment but it is not about weight it is about density.
Yes, I have been meaning to update it a bit more. Thank you.
- Pingback: Halloween Density Experiment Spooky For Spooky Fall STEM
- Pingback: Water Science Activities for Kids STEM
- Pingback: Simple Physics Activities Science Experiments STEM Ideas for Kids
- Pingback: Fun Activities to Teach Kids Creation with a Biblical Worldview
- Pingback: The BEST Very Simple Science Experiments for Kids to Try Anywhere
- Pingback: Unofficial Quarantine – Day 4 – This Fit Life
Comments are closed.

Subscribe to receive a free 5-Day STEM Challenge Guide
~ projects to try now ~.

- Skip to primary navigation
- Skip to main content
- Skip to primary sidebar

- FREE Experiments
- Kitchen Science
- Climate Change
- Egg Experiments
- Fairy Tale Science
- Edible Science
- Human Health
- Inspirational Women
- Forces and Motion
- Science Fair Projects
- STEM Challenges
- Science Sparks Books
- Contact Science Sparks
- Science Resources for Home and School
10 Science Experiments Using Salt for Home and School
May 27, 2024 By Emma Vanstone Leave a Comment
Salt is a brilliant, versatile and inexpensive ingredient for science at home. It can be used to cool a drink or make ice cream quickly, for a lava lamp, and to make coloured salt crystals. Salt is an interesting substance as it lowers the freezing point of water, leading to lots of exciting science experiments!
Salt can also be used to preserve food and is thought to have been used by humans since 6050 BC*.
Fun Facts about Salt
The salt we eat has the chemical formula NaCl ( sodium chloride ).
A mixture of salt and water can conduct electricity.
Salt can preserve food as it slows the growth of microorganisms.
Salt is used to treat roads in winter as it lowers the temperature at which water freezes.
Science Experiments For Kids Using Salt
Lift a piece of string with ice and salt.
Use salt to lift a piece of ice with string . In this clever trick, the salt melts the ice around the string. The ice then refreezes over the string, allowing the ice cube to be lifted.

Cool a drink with ice and salt
Find out how to cool a drink with ice and salt . This is a great activity for a sunny day and a fantastic visual science demonstration as you can watch the temperature drop in seconds.

Salt Lava Lamp
A salt lava lamp is a fun twist on the more traditional lava lamp activity. It’s easy to set up and looks great.

Coloured Salt Crystals
Creating coloured salt crystals is a brilliant way to learn about evaporation. You’ll need a warm day, food colouring, water and salt.

Separate salt and pepper with static electricity
Did you know you can use static electricity to separate salt and pepper ? Both salt and pepper are attracted to a charged object, but pepper is lighter, and so jumps up more easily.

Ice cream in a bag
Salt and ice are used to make ice cream in a bag . This traditional science activity tastes amazing and uses only basic ingredients. We like to use chocolate milk to make chocolate ice cream!

Salt and water density trick
Another simple science experiment using salt is this density trick. If you add salt to water, its density increases. This means you can create a colourful density demonstration with a layer of salt and water and a layer of food colouring and water.

Melting ice cubes
Find out whether an ice cube melts faster in salty water or fresh water with another simple science activity.

Instant slushy drink
This works in the same way as the ice cream in a bag activity. We use fruit juice instead of milk to make an instant slushy drink ! Yum!

Make an egg float
Use salt to increase the density of water and make an egg float !

Frost on a Can
Use the cooling power of ice and salt to make frost appear on the outside of a tin can .

More salty science experiments
Little Bins for Little Hands has a lovely salt painting activity .
Living Well Mom has some beautiful salt snowflakes .
Make your own conducting play dough using salt!
Can you think of any more science experiments using salt for us?
* History of Salt

Last Updated on June 13, 2024 by Emma Vanstone
Safety Notice
Science Sparks ( Wild Sparks Enterprises Ltd ) are not liable for the actions of activity of any person who uses the information in this resource or in any of the suggested further resources. Science Sparks assume no liability with regard to injuries or damage to property that may occur as a result of using the information and carrying out the practical activities contained in this resource or in any of the suggested further resources.
These activities are designed to be carried out by children working with a parent, guardian or other appropriate adult. The adult involved is fully responsible for ensuring that the activities are carried out safely.
Reader Interactions
Leave a reply cancel reply.
Your email address will not be published. Required fields are marked *
Salt Water Density Experiment

Introduction: Salt Water Density Experiment

Step 1: Materials

Step 2: Procedure
Step 3: Additional Ideas and Resources

Extension/Modification Ideas:
- Use a triple beam balance of electronic scale to teach or practice that skill
- Use hot and cold water instead.
- Compare salt and fresh water and connect with the environment.
- Have older students teach this to younger students.
- Use other liquids to make density columns. (Water, oil, alcohol, etc.)
- Make a much larger one as part of a science night.
- Let students try making different density salt solutions and try to figure out which ones work the best and how that relates to density.
Other Density Demos:
- Egg in salt water or tap water
- Ice in water or rubbing alcohol
Attachment: I attached a Word document that is a template for a guided lab report that you feel free to modify and use. Other Ideas and Resources: These are just some ideas and alternate extensions. Some additional references will many different versions of this same idea: DENSITY: SALTWATER COLUMN LAB TEACHER PREPARATION Explains a different way to prepare solutions and some "discussion" questions as a worksheet for students Liquid Rainbow Written from the standpoint of ocean science for elementary school. Contains a lot of "teacher lingo" (e.g. key concepts, big idea, objectives, etc.) GEMS: Discovering Density book This book costs $18, but I think is where I first saw the idea for this lab. The handouts are free online in Spanish. So that might make this a cool activity to do with students learning Spanish too! Steve Spangler 7-Layer Density Column This link provides a video showing a different density experiment with different types of liquids to see how their relative densities are different. They do use the word "heavier" instead of density. He uses a slightly different way of layering. NOAA Lesson Plan: Hot, Cold, Fresh and Salty Another Earth Science/Oceans connection. This lesson plan gives ideas about having students compare hot and cold water and fresh and salty water. These are extensions that would be great to add to a simpler lesson like the one I posted.
Step 4: Real World Connection

In research labs, human blood is carefully pipetted to form a layer on top of a substance called Ficoll-Paque (made by GE). When this tube is centrifuged, the red blood cells (the most dense) go to the bottom, the Ficoll is (the next most dense), then the white blood cells, and finally the plasma (the least dense). Labs use this technique to isolate different parts of the blood. For instance, if you want to isolate the white blood cells, you can remove the plasma layer (yellow) and then gently extract the thin cloudy white layer that contains the white blood cells. Wikipedia's Ficoll-Paque Article This page describes the basics of Ficoll Ficoll-Paque PLUS Manufacturer's Description A short paragraph from the manufactures that uses the word density multiple times Ficoll-Paque Instructional Video This video shows the layering of blood on top of the Ficoll very slowly and gently and the final layers that form
Step 5: Graphic Organizer Word Document
Someone let me know the Word document does not open currently. I tried uploading another version but it also says forbidden. Message me and I can try to send it to you.

Participated in the Education Contest
Recommendations

Woodworking Contest

Farm to Table Contest

Art and Sculpture Contest

Sink or Float: Density of Salt Water
This post may contain affiliate links.

Today I want to show you a Sink or Float Salt Water Density activity we did. I have been wanting to do this activity for a long time and I’m glad we finally got around to it!

We experimented with the salinity of water and how it affects items sinking or floating. We did this on the density of water based on its salt content by using fresh water, and also water with the approximate salt content in the ocean, the Great Salt Lake, the Dead Sea (bordering Israel and Jordan).
I have spent a lot of time around different bodies of salt water in my life. I grew up in Florida right by the ocean and spent many many days swimming in the ocean there.
I also had the opportunity to do a semester abroad in Israel and swam in the Dead Sea while there.
Now, I live near the Great Salt Lake and have had the opportunity to visit it with my children. The last time we visited the Salt Lake as a family, I started thinking about trying this sink or float experiment at home with my kids.
I remember swimming in the Dead Sea. The amount of salt in the water makes your skin sting a bit when you go in. It is nearly impossible to not float due to the high density of the water. It is a strange feeling to just float so easily in water with very little effort. There is a similar feeling in the Salt Lake.
Different amounts of salt in the water will create different densities. Denser water will create greater buoyancy, meaning things will float more. We decided to simulate this by trying to recreate water with the same amount of salt as each of these bodies of water.
Since we had some background knowledge to this already, we knew our predictions would likely be correct. The more salt you add to water, the more dense it will be, and thus the more likely it will be that items will float in it.
How to Do the Sink or Float: Density of Salt Water Experiment

Supplies We Used:
Quart sized glass jars, wide mouth
Measuring cup and teaspoon
Various household objects
In deciding how much salt we put into the water, we based it on the percentage of salt in each body of water. I used a food scale to measure it in grams. This makes it a little easier anymore accurate.

Our control was the fresh tap water. We filled one jar with 3 cups or 720 g. of regular water and tested what would float in it. We used a few different items to compare. We put the same amount of water in each jar with varying amounts of salt percentages.
Quantity of Salt in Ocean Water:
The next jar was our ocean water. Salty ocean water is 3.5% salt. So in a jar with 3 cups or 720 g. of water that would equal 25.2 grams of salt. A teaspoon was approximately 6.5 g. of salt or 3 3/4 tsp. salt.

Quantity of Salt in the Great Salt Lake
For our third jar of water, we created water similar to the salinity of the water in the Great Salt Lake. This one is tricky because the salt levels fluctuate based on the water levels of the lake and also the location in the lake. Some areas have a higher salt content than others. I decided to go with sort of a middle, average range of 15%. That equaled 108 grams of salt which is a little more than 1/3 c of salt in 3 c. of water.
Quantity of Salt in the Dead Sea

The fourth jar of water represented the Dead Sea. The water in the Dead Sea is one of the saltiest bodies of water on the earth’s surface. There is eight times more salt in Dead sea than ocean 36% salt! At 36% salt that equals 259.2 grams of salt (about 3/4 c.) of salt in the 720 g. (3 c.) of water.
Saltiest Body of Water: Gaet’ale Pond
The Dead Sea is not the saltiest body of water on earth. Gaet’ale Pond in Ethiopia is 43% salt, but you can’t swim in this one! It’s typically over 120 degrees Fahrenheit and emits toxic gases. We did not test out the density of this one, but it is a fun fact to teach!
Will it Sink or Float?
Once the jars have both the salt and water, stir them with a spoon until the salt is dissolved as much as possible. It may get a little messy, so if you are concerned about mess, do this experiment outside, over a sink or in a small tub to catch the spills.

Now you can test out the density of each of the jars of water by seeing what things will sink or float in each jar.
Objects to Try for the Sink or Float Experiment
We tested out each of the jars of water with several common household items. You can try anything, but here are some ideas:

- wooden blocks
- hard-boiled egg vs. a raw egg
- cherry tomatoes
- plums, apples, oranges, grapes
- highlighter pens (pencils and crayons would work well)
- ping pong balls or bouncy balls, aluminum foil rolled into a tight ball
- small toys- like lego, or army men, small toy cars
- small objects like a coin, a paper clip, dry pasta, eraser, bottle cap, buttons, coins
Try a variety of dense objects and buoyant objects so you can get a better idea of how they work.
It was really fun to make a prediction of each object and then see which guesses were correct. Sometimes we were surprised by the outcome. It was also surprising to see how much more things would float in the the saltiest water.

Our predictions that overall liquids with more salt will have a higher density and fresh water will have a low density.
Sometimes an object would sink in the fresh water, but float in all of the salt water jars, no matter the amount of salt. Sometimes we could see that the object would sit higher or lower at the top of the water.
We really enjoyed this experiment and hope you will, too!
See More Water Experiments: 25 Water Science Experiments and Activities!
Also check out this Density Experiment for Kids where we tested the density with different liquids and substances including corn syrup, gel, and more!
Former school teacher turned homeschool mom of 4 kids. Loves creating awesome hands-on creative learning ideas to make learning engaging and memorable for all kids!
Similar Posts

Soft Circuit Christmas Ornament – Christmas STEAM

Printable Road Trip Scavenger Hunt for Kids

Glowing Invisible Ink Secret Messages

Scientific Method Worksheets and Posters

Green Eggs Chemistry Experiment
Cloud Formations- With Printable Chart
Leave a reply cancel reply.
You must be logged in to post a comment.
Mobile header. Includes: optional ticker, search and main navigation
- Follow us on Facebook
- Follow us on Instagram
- Follow us on youtube
- Follow us on Tiktok
- © 2024 Scitech
- Accessibility
Call us 08 9215 0700
Visit us City West Centre Corner Railway Street & Sutherland Street West Perth, Western Australia 6005
What's on today
Element of Surprise (Weekends)
A Little Space
Quokkavision
We are Stars
Site header. Includes: search, main navigation and secondary navigation
Water salinity and density.
In this experiment, discover how the density of salt water can create interesting effects in nature.
Evan is back with another impressive water experiment that you can try at home to learn about water salinity and density.
Fresh water is less dense than salt water, so it can sit on top. In undistributed waters, they can remain as separate bodies for a long time! This is referred to as a salt wedge. Did you know there is a pretty amazing salt wedge in the swan river? The wedge of salt water can move up to 55km upstream of the Swan River.
What you’ll need:
- 2 plastic trays
- A plastic clipboard (or a thin plastic chopping board)
- 5 litres of water
- Measuring spoons
- Mixing spoon
- 2 different colours of food colouring
- 5 jars with a flat rim (big enough to hold about a litre of water each)
Instructions
- Fill each jar with water. Place your egg in the first jar and watch how it sinks to the bottom. This is because the egg is more dense than the water around it.
- In the same jar, start adding large scoops of salt into the water. You may need to stir the salt around to ensure it dissolves into the water. Keep adding salt until the egg floats to the top. When this happens, the water is now more dense than the egg.
- Next, let’s see what happens when fresh water and salt water meet. Grab two more jars of fresh water, and place one of the jars onto one of your plastic trays. Add a few drops of one colour of food colouring to the first jar, then add a different colour to the second jar.
- To the first jar on your plastic tray, add a spoonful of salt and stir. Place the plastic board on top of the second jar, and hold tight to flip the jar over. With the board still in place underneath the second jar, place it on top of the first jar and ensure the openings of both jars are aligned. Carefully remove the board from between the jars.
- Notice how the colours contained within each jar of water don’t mix: this is because the “fresh” water in in the second jar is less dense than the salty water in the first.
In nature, this effect is known as a “halocline”. When a river of freshwater meets the ocean, the fresh water flows on top of the salty water, until forces like wind and waves mix them together.
- Let’s see what happens when we put fresh water on the bottom and salt water on top. Repeat Steps 3-4, this time placing the jar of salt water on top. Notice how the denser, salty water rushes to the bottom of the other jar and the colours mix together.
Looking for more activities to do at home?

Try the next experiment

Try an at home challenge
Listen to a curious podcast by Scitech
Site mobile footer. includes: find us info, social links, logo, about scitech, government of western australia logo and footer links., about scitech.
Scitech is a not-for-profit organisation proudly supported by the Western Australian Government through the Department of Jobs, Tourism, Science and Innovation
Upon clicking the "Book Now" or "Buy Gift Card" buttons a new window will open prompting contact information and payment details.
Salt Water Density Experiment
How does food coloring react to salt & fresh water.

We love experiments that are no fuss and easy! Paired with our FREE observation lab sheet, how can you go wrong! Your students get to predict what they think will happen, make observations, and then conclude why. This experiment uses simple kitchen items to mesmerize your students. We use this Salt Water Density Experiment while investigating our Earth’s Water Unit since it is an effective at displaying the difference in density between salt and fresh water.
*Don’t miss our Floating Egg Experiment with FREE lab sheets that also investigates the difference in density between fresh and salt water. Wait… there’s more! Discover how the freezing point of salt water and fresh water differ in this experiment, “Does Fresh or Salt water freeze faster?”
As a Christian Book and Amazon affiliate, we may earn commissions from qualifying purchases. Thank you for your support. As always, we only recommend items that we truly feel will benefit your homeschooling experience. We appreciate it.
Important Terms and Facts to Introduce
Before conducting the experiment, there are a few things you should cover with your students to create a meaningful learning experience. First, spend time talking about the terms below. We discuss the meaning of salinity and density amongst other terms.
– Density is the amount of mass in a given volume.
– Salt is also called Sodium Chloride.
– Salinity describes the amount of salt dissolved in water. Saline water is water with salt dissolved in it.
– Solution is a type of homogeneous mixture composed of two or more substances.
– Solute is a substance dissolved in another substance, known as a solvent .
– Water’s density is 1 g/ml.
Salt Water Density Experiment Observation Sheet

The Salt Water Density Experiment Observation Sheet will guide your students through predictions, observations, and give students a place to write a conclusion. Teacher will need to guide student through the experiment and science explanation.
Gather Materials
The materials list is likely to be found within your kitchen. You will need 2 clear glasses, water, salt, and food coloring. Yes, that is it!
Salt Water Density Experiment Lab Procedures
Make predictions.
We started by filling both glasses up with about 1 1/2 cups of water. To create salt water, we added 2 tablespoons of salt to one of the glasses and stirred until completely dissolved.
Next, the students made their predictions about what they thought would happen when we added the food coloring to each glass. One of mine thought that the fresh water would be lighter in color while the salt water would be darker. Two other students predicted that the food coloring would produce bubbles in the salt water.
Make Observations

The first glass we put food coloring into was the fresh water. We only put 3 drops of blue food coloring in. There is no need to stir. This is the optimum time to just observe and then draw your observations. You will notice that the food coloring drops went to the bottom of the glass.
Next, we added the drops of food coloring to the salt water. As you can tell from the next photo, it immediately stopped when it hit the saline solution. It stayed in a layer above the salt water.
Draw Conclusions

the kids and I talk about why they think the food coloring reacted the way it did. In the end, we discuss how salt added mass to the density of the water causing it to become more dense. The density of water is a little less than 1 g/ml. So, if something sinks in water, like the food coloring, it is more dense. If something floats on a liquid, like the food coloring in the salt water glass, it is less dense.
What I find interesting though, is that if you wait thirty minutes or so, the food coloring in both glasses will disperse. This is because the density of all of the liquids are close enough that the water molecules will eventually collide and join. Liquid molecules move and slip past each other. Pretty cool, huh?
DOWNLOAD Salt Water Density Experiment Observation Sheet
More free resources.

John 4:14 – But whosoever drinketh of the water that I shall give him shall never thirst; but the water that I shall give him shall be in him a well of water springing up into everlasting life.

Share this:
37 Water Science Experiments: Fun & Easy
We’ve curated a diverse selection of water related science experiments suitable for all ages, covering topics such as density, surface tension, water purification, and much more.
These hands-on, educational activities will not only deepen your understanding of water’s remarkable properties but also ignite a passion for scientific inquiry.
So, grab your lab coat and let’s dive into the fascinating world of water-based science experiments!
Water Science Experiments
1. walking water science experiment.

This experiment is a simple yet fascinating science experiment that involves observing the capillary action of water. Children can learn a lot from this experiment about the characteristics of water and the capillary action phenomenon. It is also a great approach to promote scientific curiosity and enthusiasm.
Learn more: Walking Water Science Experiment
2. Water Filtration Experiment

A water filtering experiment explains how to purify contaminated water using economical supplies. The experiment’s goal is to educate people about the procedure of water filtration, which is crucial in clearing water of impurities and contaminants so that it is safe to drink.
Learn more: Water Filtration Experiment
3. Water Cycle in a Bag
The water cycle in a bag experiment became to be an enjoyable and useful instructional exercise that helps students understand this idea. Participants in the experiment can observe the many water cycle processes by building a model of the water cycle within a Ziplock bag.
4. Cloud in a Jar

The rain cloud in a jar experiment is a popular instructional project that explains the water cycle and precipitation creation. This experiment is best done as a water experiment since it includes monitoring and understanding how water changes state from a gas (water vapor) to a liquid (rain) and back to a gas.
Learn more: Cloud in a Jar
5. The Rising Water
The rising water using a candle experiment is a wonderful way to teach both adults and children the fundamentals of physics while also giving them an exciting look at the properties of gases and how they interact with liquids.
6. Leak Proof Bag Science Experiment

In the experiment, a plastic bag will be filled with water, and after that, pencils will be inserted through the bag without causing it to leak.
The experiments explain how the plastic bag’s polymer chains stretch and form a barrier that keeps water from dripping through the holes the pencils have produced.
Learn more: Leak Proof Bag Science Experiment
7. Keep Paper Dry Under Water Science Experiment

The experiment is an enjoyable way for demonstrating air pressure and surface tension for both adults and children. It’s an entertaining and engaging technique to increase scientific curiosity and learn about scientific fundamentals.
Learn more: Keep Paper Dry Under Water Science Experiment
8. Frozen Water Science Experiment
The Frozen Water Science Experiment is a fun and engaging project that teaches about the qualities of water and how it behaves when frozen.
You can gain a better knowledge of the science behind the freezing process and investigate how different variables can affect the outcome by carrying out this experiment.
9. Make Ice Stalagmites
10. Bending of Light
A fascinating scientific activity that explores visual principles and how light behaves in different surfaces is the “bending of light” water experiment. This experiment has applications in physics, engineering, and technology in addition to being a fun and interesting method to learn about the characteristics of light.
11. Salt on a Stick

This experiment is an excellent way to catch interest, engage in practical learning, and gain a deeper understanding of the characteristics of water and how they relate to other substances. So the “Salt on Stick” water experiment is definitely worth trying if you’re looking for a fun and educational activity to try!
Learn More: Water Cycle Experiment Salt and Stick
12. Separating Mixture by Evaporation
This method has practical applications in fields like water processing and is employed in a wide range of scientific disciplines, from chemistry to environmental science.
You will better understand the principles determining the behavior of mixtures and the scientific procedures used to separate them by performing this experiment at home.
13. Dancing Spaghetti
Have you ever heard of the dancing spaghetti experiment? It’s a fascinating science experiment that combines simple materials to create a mesmerizing visual display.
The dancing spaghetti experiment is not only entertaining, but it also helps you understand the scientific concepts of chemical reactions, gas production, and acidity levels.
14. Magic Color Changing Potion
The magic color-changing potion experiment with water, vinegar, and baking soda must be tried since it’s an easy home-based scientific experiment that’s entertaining and educational.
This experiment is an excellent way to teach kids about chemical reactions and the characteristics of acids and bases while providing them an interesting and satisfying activity.
15. Traveling Water Experiment

In this experiment, you will use simple objects like straws or strings to make a path for water to pass between two or more containers.
Learn more: Rookie Parenting
16. Dry Erase and Water “Floating Ink” Experiment

The dry-erase and water “floating ink” experiment offers an interesting look at the characteristics of liquids and the laws of buoyancy while also being a great method to educate kids and adults to the fundamentals of science.
Learn more: Dry Erase and Water Floating Ink Experiment
17. Underwater Candle
In this experiment, we will investigate a connection between fire and water and learn about the remarkable factors of an underwater candle.
18. Static Electricity and Water
19. Tornado in a Glass

This captivating experiment will demonstrate how the forces of air and water can combine to create a miniature vortex, resembling a tornado.
Learn more: Tornado in a Glass
20. Make Underwater Magic Sand
Be ready to build a captivating underwater world with the magic sand experiment. This experiment will examine the fascinating characteristics of hydrophobic sand, sometimes referred to as magic sand.
21. Candy Science Experiment
Get ready to taste the rainbow and learn about the science behind it with the Skittles and water experiment! In this fun and colorful experiment, we will explore the concept of solubility and observe how it affects the diffusion of color.
Density Experiments
Density experiments are a useful and instructive approach to learn about the characteristics of matter and the fundamentals of science, and they can serve as a starting point for further exploration into the fascinating world of science.
Density experiments may be carried out with simple materials that can be found in most homes.
This experiment can be a great hands-on learning experience for kids and science lovers of all ages.
22. Super Cool Lava Lamp Experiment

The awesome lava lamp experiment is an entertaining and educational activity that illustrates the concepts of density and chemical reactions. With the help of common household items, this experiment involves making a handmade lava lamp.
Learn more: Lava Lamp Science Experiment
23. Denser Than you Think
Welcome to the fascinating world of density science! The amount of matter in a particular space or volume is known as density, and it is a fundamental concept in science that can be seen everywhere around us.
Understanding density can help us figure out why some objects float while others sink in water, or why certain compounds do not mix.
24. Egg Salt and Water
Learn about the characteristics of water, including its density and buoyancy, and how the addition of salt affects these characteristics through performing this experiment.
25. Hot Water and Cold-Water Density
In this experiment, hot and cold water are put into a container to see how they react to one other’s temperatures and how they interact.
Sound and Water Experiments
Have you ever wondered how sound travels through different mediums? Take a look at these interesting sound and water experiments and learn how sounds and water can affect each other.
26. Home Made Water Xylophone

You can do this simple scientific experiment at home using a few inexpensive ingredients to create a handmade water xylophone.
The experiment demonstrates the science of sound and vibration and demonstrates how changing water concentrations can result in a range of tones and pitches.
Learn more: Home Made Water Xylophone
27. Create Water Forms Using Sound!
A remarkable experiment that exhibits the ability of sound waves to influence and impact the physical world around us is the creation of water formations using sound.
In this experiment, sound waves are used to generate patterns and shapes, resulting in amazing, intricate designs that are fascinating to observe.
28. Sound Makes Water Come Alive
These experiments consist of using sound waves to create water vibrations, which can result in a variety of dynamic and captivating phenomena.
29. Water Whistle
The water whistle experiment includes blowing air through a straw that is submerged in water to produce a whistle.
This experiment is an excellent way to learn about the characteristics of sound waves and how water can affect them.
Water Surface Tension Experiments
You can observe the effects of surface tension on the behavior of liquids by conducting a surface tension experiment.
By trying these experiments, you can gain a better understanding of the properties of liquids and their behavior and how surface tension affects their behavior.
30. Floating Paperclip
In this experiment, you will put a paper clip on the top of the water and observe it float because of the water’s surface tension.
31. Water Glass Surface Tension
Have you ever noticed how, on some surfaces, water drops may form perfect spheres? The surface tension, which is a characteristic of water and the cohesive force that holds a liquid’s molecules together at its surface, is to blame for this.
32. Camphor Powered Boat
The camphor-powered boat experiment is a fun and fascinating way to explore the principles of chemistry, physics, and fluid mechanics. In this experiment, a miniature boat is used to travel across the water’s surface using camphor tablets.
33. Pepper and Soap Experiment

The pepper in a cloud experiment is a simple and interesting activity that explains the concept of surface tension. This experiment includes adding pepper to a bowl of water and then pouring soap to the mixture, causing the pepper to move away from the soap.
Learn more: Pepper and Soap Experiment
Boiling Water Experiments
Experiments with boiling water are an engaging and informative way to learn about physics, chemistry, and water’s characteristics.
These investigations, which include examining how water behaves when it changes temperature and pressure, can shed light on a variety of scientific phenomena.
It’s important to take the proper safety measures when performing experiments with hot water. Boiling water can produce steam and hot particles that are dangerous to inhale in and can result in severe burns if it comes into contact with skin.
34. Make It Rain

This experiment can be accomplished using basic supplies that can be found in most homes, make it an excellent opportunity for hands-on learning for both kids and science lovers.
Learn more: Make it Rain
35. Fire Water Balloons
Learning about the fundamentals of thermodynamics, the behavior of gases, and the effects of heat on objects are all made possible by this experiment.
36. Boil Water with Ice
The Boiling Water with Ice experiment is an engaging and beneficial approach to learn about temperature and the behavior of water. It can also serve as an introduction for further discovery into the wonderful world of science.
37. Boil Water in a Paper Cup
The “boil water in a cup” experiment is an easier but powerful approach to illustrate the idea of heat transmission by conduction. This experiment is often used in science classes to teach students about thermal conductivity and the physics of heat transfer.
Similar Posts:
- 68 Best Chemistry Experiments: Learn About Chemical Reactions
- Top 100 Fine Motor Skills Activities for Toddlers and Preschoolers
- Top 50 Fun Food Science Experiments
Leave a Comment Cancel reply
Save my name and email in this browser for the next time I comment.
Salt Water Experiment

Science for Kids: Salt Water Experiment
Looking for a fun after-school activity to do with the kids? Explore density with this fun salt water experiment!
- Two clear glasses
- Two raw eggs
Instructions:
- Fill the two glasses with tap water.
- Add about 6 tablespoons of salt in one container and stir it well with a tablespoon until the salt has completely dissolved in the water.
- Place one egg in each of the containers and observe which one of the eggs float in the container and which one sinks.
How does it work?
The first egg sinks to the bottom of the glass of regular tap water. This is because a raw egg has a greater density than regular tap water. Essentially, the egg has more matter stuffed into a specific area (volume) than the same amount of water. When you add salt to the water, you increase the density. That is to say, the salt packs into the same volume of water. With enough salt added to the water, the density of the water is greater than the egg, allowing the egg to float.
For more DIY and eco-friendly projects, check out our Pinterest page! If you’re not already a Green Kid Crafts subscriber, don’t wait another day to join !
Every month a different box! For kids ages 2-10+
With 4-6 activities each, our boxes pack a punch.
What’s different about Green Kid Crafts?

Discovery Science & Craft Subscription (Ages 5-10+)

Junior Science & Craft Subscription (Ages 3-5)

Volcano Science

Dinosaur Science

Interesting Insects

Dig It Out Gemstone Excavation Kit

Sign Up for Emails & Special Offers
On the blog, previous post recycle fall pumpkins 7 different ways, next post magnet science experiment.
That was a cool experiment!
Im testing this Expirement for my sciece fair project (Due:November.18.2022)
Leave a Reply
Save my name, email, and website in this browser for the next time I comment.
How to Separate Salt from Water
Last Updated: July 20, 2024 Fact Checked
This article was co-authored by Meredith Juncker, PhD . Meredith Juncker is a PhD candidate in Biochemistry and Molecular Biology at Louisiana State University Health Sciences Center. Her studies are focused on proteins and neurodegenerative diseases. There are 7 references cited in this article, which can be found at the bottom of the page. This article has been fact-checked, ensuring the accuracy of any cited facts and confirming the authority of its sources. This article has been viewed 320,631 times.
How do you get the salt out of saltwater? For centuries, this question has baffled sailors stranded at sea and students stranded at science fairs alike. The answer is simple — evaporation. When you cause saltwater to evaporate (either naturally or with artificial heat), only the water forms water vapor — the salt is left behind. With this knowledge, it's fairly easy to separate salt from water with the sort of ordinary materials you might have at home.
Performing a Basic Evaporation Experiment

- The reason hot water is best for dissolving salt (and other chemicals) has to do with the motion of the molecules making up the water. When the water gets hot, the molecular motion increases, running into more salt molecules and making the bonds easier to pull apart. [1] X Research source

- When water reaches its saturation point, it no longer has any ability to dissolve salt at a molecular level — so much salt has dissolved that there is no longer any chemical potential for the water to pull apart new salt crystals. [2] X Research source

- Don't waste your leftover salt water — there are tons of things you can use it for. For instance, you can use it to poach an egg, boil potatoes, preserve spinach, and even help you peel nuts! [3] X Research source

- Feel free to scrape a little bit of salt from your paper to season your food — it should be perfectly safe to eat. Be careful not to get any paper shavings in your food, though!
Making a Distiller

- As the saltwater boils, the water (minus the salt) will turn into steam and rise out of the pot. As it hits the lid, it will cool slightly and form liquid condensation (water) on the underside of the lid. This water doesn't contain salt, so all we need to do is gather it to have salt-free water.

- If you like, you can also run a long, skinny metal or glass object (like a stirring rod or thermometer) from the bowl up to the lowest point on the lid — the water should run down this object into the bowl.

- Technically, this water should be safe to drink. However, unless you're sure that both the lid for your pot and the bowl you collected the water in (and the skinny metal or glass rod, if you used one) are clean, you may not want to do this.
Using Uncommon Methods

- Reverse osmosis pumps are sometimes sold for residential use but are also often used for recreational purposes like camping. Pumps can be somewhat expensive, usually running several hundred dollars. [5] X Research source

- Decanoic acid is available from chemical supply stores — usually around $30-$40 per bottle.

- Note that this process does not necessarily remove bacteria or other contaminants from the water, so further treatment may be needed to get drinkable water from this method in the wild. Recent research has been promising, however, suggesting new techniques that do kill bacteria as part of the process.
Expert Q&A

- You can also use a solar still which doesn't need a stove at all. All you need is a hole in the ground, some plastic wrap, rocks, and a small bowl or cup. Thanks Helpful 2 Not Helpful 0
- Don't use seawater unless you have to. In addition to salt, it can also contain minerals, organic matter, and other contaminants that can make it harder to purify completely. Thanks Helpful 1 Not Helpful 0
- Be careful whenever you're boiling water on the stove. If you need to touch the hot pot or pan, be sure to use an oven mitt or a towel to protect yourself. Thanks Helpful 12 Not Helpful 16
- Don't drink saltwater if you're lost in the wilderness. Our bodies need more water to get rid of the salt than the water actually provides, so salt water can make someone even more dehydrated. [7] X Research source Thanks Helpful 0 Not Helpful 0
You Might Also Like

- ↑ http://www.middleschoolchemistry.com/lessonplans/chapter5/lesson6
- ↑ http://www.chemguide.co.uk/physical/phaseeqia/saltsoln.html
- ↑ https://www.npr.org/2011/11/29/142903042/cracking-the-poached-egg-code
- ↑ https://www.youtube.com/watch?v=Quy_Mg87Tsk
- ↑ https://www.youtube.com/watch?v=bbDRTQl2oPU
- ↑ http://www.thermopedia.com/content/721/
- ↑ http://water.usgs.gov/edu/qa-seawater.html
About This Article

To separate salt from water with a basic evaporation experiment, start by putting a few cups of water in a pan and placing it on a hot burner. When the water heats up, add teaspoons of salt at a time, stirring them in as you go, until the salt no longer dissolves. Next, turn the burner off and allow the water to cool slightly. Then, spoon the water onto dark construction paper and wait for the water to evaporate. As the water evaporates, it should leave behind miniature salt crystals. To learn how to make a distiller to separate your salt from your water, keep reading! Did this summary help you? Yes No
- Send fan mail to authors
Reader Success Stories
Did this article help you?
Anonymous .
Jan 10, 2017
Becky Doherty
Mar 5, 2017
Dec 13, 2017

Featured Articles

Trending Articles

Watch Articles

- Terms of Use
- Privacy Policy
- Do Not Sell or Share My Info
- Not Selling Info
Get all the best how-tos!
Sign up for wikiHow's weekly email newsletter
- About iGameMom
- DIY Computer Coding Camp at Home
- Geometry Games Improving Spatial Reasoning Skills
- Privacy Policy

- Free Resources
- Computer Coding for Kids
- Engineering Kids
- Math for Kids
- Science for Kids
- General Science
- Good Movies for Kids
- YouTube Videos for Kids
9 Science Experiments for Kids with Salt

We love easy science experiments you can do at home right in your kitchen with materials you already have. We have some kitchen science activity ideas . Today we put together fun and easy science experiments using salt. We all have salt at home, and it is inexpensive. All the activities listed here are fun and easy, and all you need are salt, ice, water, oil. Enjoy.
Salt Science Experiments with Water for Kids

How to float eggs in water ? This science experiment with salt also teaches kids why it is easier to float in ocean water.
I like how this experiment expand from the floating egg experiment, and visually show kids that salted water is heavier.
This colorful experiment further explores the density of salt vs. water, from a different angle. In addition to water and salt, kids also see that oil is lighter than water.
Salt Science Experiments with Ice for Kids
Do you have snow in winter? Why do we put salt down on the road when it snows? This salt and ice activity will show kids the reason.
This ice fishing activity also shows kids the salt melting ice effect, with added fishing fun.
Another way to show kids that salted water has higher freezing point, is to put a cup of water, and a cup of salted water in the freezer, and check back regularly every 10 minutes, and keep record on which one freeze first. More than likely, kids will see that the cup with just water freezes faster than salted water.
Salt Crystal Science Experiments for Kids
Have you ever grown your own salt crystal , and observe the shapes of the crystal? If you add some food color into the water, you are going to see a more beautiful outcome.
After growing crystal, you can then make a crystal sun catcher . Instead of regular salt, this one uses Epsom salt .
Salt Science Experiments Teaching Physics for Kids
I love this salt and popcorn science experiment . It is very easy to do. Just mix salt with popcorn before they are popped in a small glass bottle or a container that allows you see through what’s inside. You may find the result surprising. It was for me for the first time, as I guessed the salt will be at the top after shaking.
Salt Pendulum is a fun activity for kids of all ages. Ask kids measure the time that the pendulum bob swings from one end to the other, and predict what will impact the time? Will change the length of the string change the time? How about the weight, ie. the amount of salt to start with?

Looking for more kitchen science activities for kids? Try the 8 Fascinating Egg Science Experiments for Kids and 5 Pepper Science Experiments Kids Love . For even more kitchen science activities, check out the 150 Kitchen STEM Activities for Kids .

Next post: Egg in Salt Water Science Experiment
Previous post: 150 Free Winter Math Printable Worksheets
Leave a Comment
Save my name, email, and website in this browser for the next time I comment.
This site uses Akismet to reduce spam. Learn how your comment data is processed .
Welcome to iGameMom — Fun STEM learning ideas for kids. Math, science, tech, engineering activities kids love!

Popular Posts
- 3 Coding Games to Learn Shapes and Geometry with a Cool Coding Toy
- RGB Color Mixing with Coding Spring Template
- Coding Game Improving Kids Problem Solving Skills
- Coding Game for Critical Thinking Skills
Follow iGameMom!
Best STEM Learning Ideas
- 9 Back to School STEM Challenges
- 10 Cool Backyard Science Experiments for Kids
- DIY Nature Science Summer Camp at Home
- Patriotic Dinner Party STEM Challenge for Kids using Toothpicks
Best Learning Resources
- Best Learn Coding Websites and Apps for Kids
- 21 Best Math Apps Teaching Math Concepts with Games
- Best Vocabulary Learning Tools for Kids
- Best Learning Tools For Kids to Learn Counting
- Best Spelling Learning Tools for Kids on iPad and Other Tablets
Salt and Fresh Water Experiment
It is warm outside and kids are going to the beach (where there is salt water) and the pool. Some kids may notice that they float better in salt water than in fresh water. After doing this experiment, your child will know why this occurs. Explore the difference in density between salt water and fresh water with this easy experiment.
Let’s Get Started!

- 2 Glasses of Water
- Food Coloring

- Place a few ice cubes into one glass of water

- Add a few drops of food coloring into the ice water.

- Add several tablespoons of salt to the other glass of water and stir so it dissolves.
- Add some ice cubes to the salt water glass.

- Add food coloring to the salt water and see what happens.

- Compare the food coloring in the fresh and salt water.

Why it Works:
- Saltwater is denser than fresh water because the sodium chloride is dissolved in it.
- Specific amounts of salt water is heavier than the same volume of freshwater.
- When salt is dissolved in water, like at the ocean, the salt adds to the mass of the water.
- The salt makes the water denser than it would be without the salt.
- When salt is dissolved in water, as it is in ocean water, it adds to the mass of the water and makes the water denser than it would be without salt. Because objects float better on a dense surface, they float better on salt water than in fresh water.
Have fun with this experiment!
Don’t forget to check our two books, Teach your Toddler to Read Through Play and Fun and Easy Ways to Teach your Toddler to Write.
Share this:

Published by simplyoutrageousyouth
View all posts by simplyoutrageousyouth
20 thoughts on “ Salt and Fresh Water Experiment ”
Definitely a great science experiment! Something great for the kids to do during this summer!
Thank you Estefany for the comment. Yes this is simple and fun!
We LOVE experiments like this. This one looks fun and easy to do with things I already have. Thanks!
OH great! I love easy and fun experiments as well. I hope your kids enjoy it. Thank you for commenting Charlene!
My kids are going to love this experiment! It looks like so much fun! Can’t wait to try it out!
Oh great! I do hope your kids enjoy it! It was so simple and fun!
What an amazing experiment on density for kids! You rocked it mama! Thanks for sharing.
Thank you Tam for the comment and compliment!
This is such a great experiment, i better freeze up a bunch of ice cubes fro this weekend. My girls will love this!
Oh great! I hope your girls have fun with this! Thank you for commenting.
This is so easy. My girls would love it. Saving it for my summer activities. Thanks for sharing.
No problem! I love fun and easy activities! Thank you for commenting.
Such a great experiment! We did a similar freshwater/saltwater experiment like this (but with eggs), with our science camp kids, and it was a hit!
This would be cool to do with eggs. My son and I will try this soon. Thank you!
This is such a fun activity with the kids!
Thank you for your comment Mansi!
Hello! I LOVE this for my students, you wouldn’t happen to have a lab sheet to go along with it, would you? Thank you!
Hello Nichole, I am sorry. We don’t have a lab sheet for this experiment. Thank you for your comment. I am glad you like this experiment.
why do you need ice in the water?
Hello Alysha, you don’t need ice. We always put ice in our water.
Leave a Reply Cancel reply
Discover more from.
Subscribe now to keep reading and get access to the full archive.
Continue reading
Explore the natural world through science and sustainability

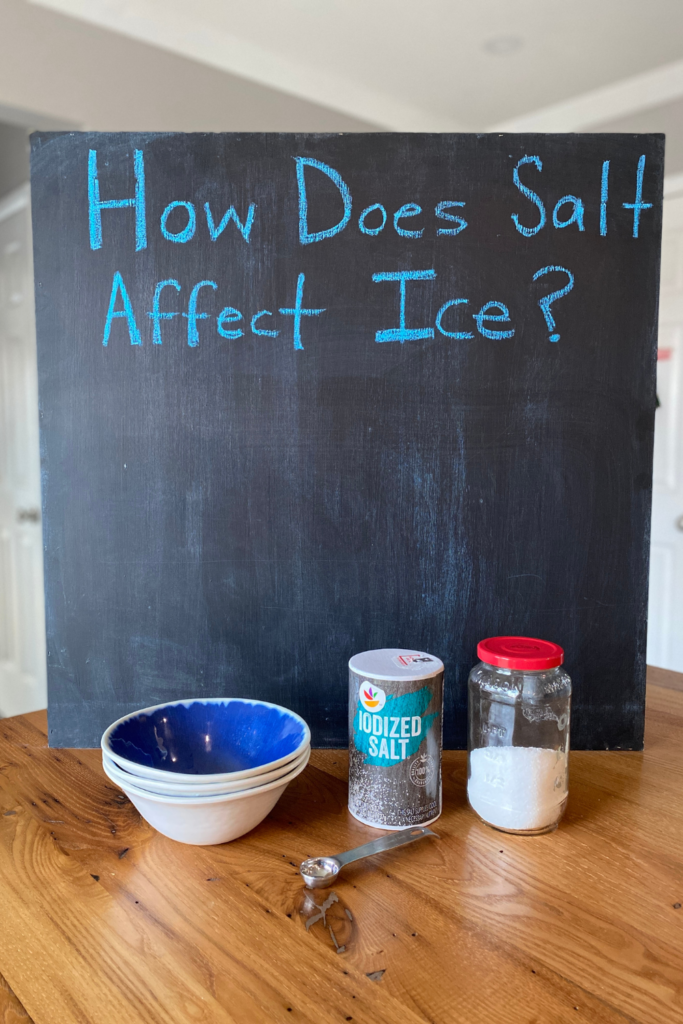
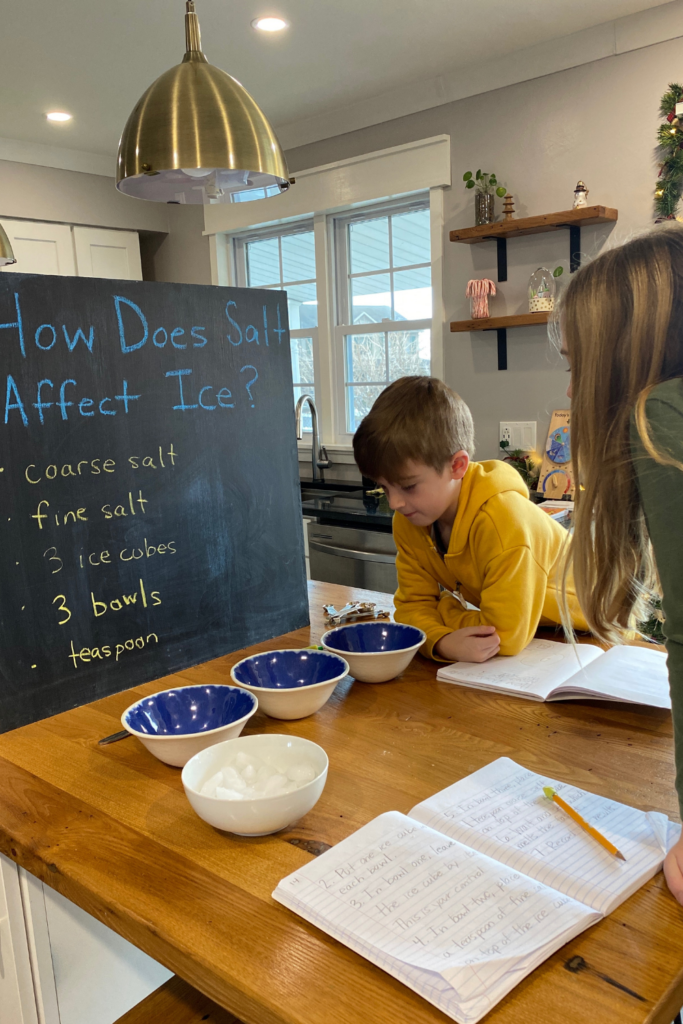
How Does Salt Affect Ice? A Simple Science Experiment
Looking for a way to explain to your learners why salt is utilized to combat icy roadways and sidewalks? Check out this simple science experiment to demonstrate how salt affects the freezing point of water and how the over-utilization of salt can be harmful to the environment.
Every winter before a storm, large trucks rumble down the road through my neighborhood, spreading salt crystals over the pavement. My six-year-old was curious about why these trucks appeared before a storm and so I decided to not only tell him but to show him, with a simple science experiment.
The Simple Science of Water and Salt
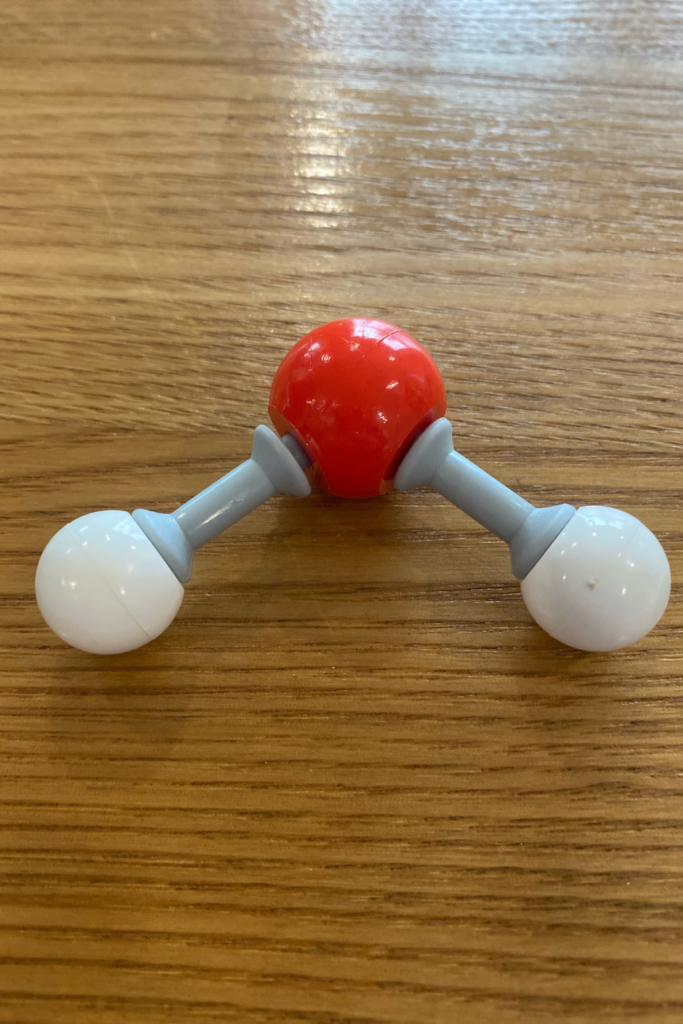
To provide my kids with a bit of background information, I broke out my chemistry modeling set and gave them a brief description of what’s happening at the molecular level.
Water is a molecule that is made up of two elements: hydrogen and oxygen. Water, also written as H 2 O, freezes at 0℃ or 32℉. However, when a compound like sodium chloride, NaCl, what we commonly refer to as salt, is dissolved in water, something interesting happens. The salt compound breaks apart into sodium and chlorine ions and prevents the water molecules from bonding together at their normal freezing point of 0℃ or 32℉. The addition of salt actually lowers the freezing point of water!
When this occurs, we can’t actually see the sodium and chlorine ions at work, as they are way too small for our eyes to observe. What we do notice is that, when salt is applied to ice, the ice begins to melt. This is because the composition of water is no longer plain H 2 O; it now has sodium and chlorine ions floating around in it, causing the freezing point to decrease.
How’s that for some snazzy science?
Making the Science of Salt and Water Visible
In order to visualize the concept of salt lowering the freezing point of water, I gathered a few simple supplies from my kitchen and got to work. This experiment took approximately 30 minutes for my kids to complete from start to finish, with additional time to discuss the environmental implications of adding salt to icy roadways.
Materials Needed for the Science Experiment
To demonstrate how salt affects the freezing point of water, you’ll need the following materials:
- 2 Ice cubes
- Table salt*
- Timer or Clock
*You can use either fine or coarse table salt for this experiment. I chose to use both to demonstrate the difference in melting time for each option. If you want to test both salt types as well, you will need 3 ice cubes and 3 bowls.
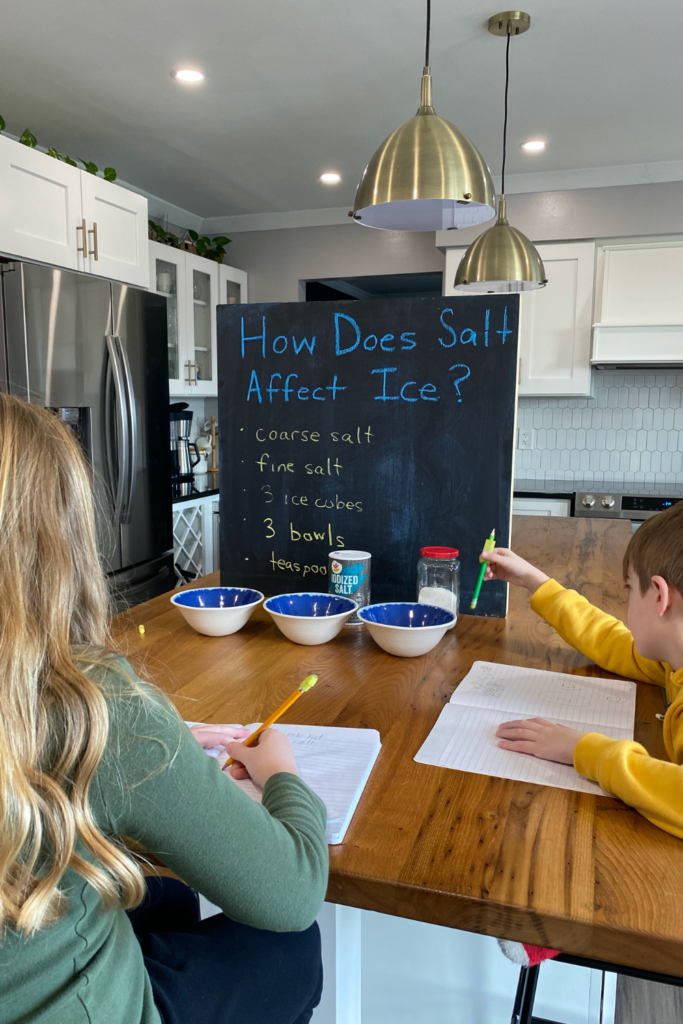
Make Predictions to Practice Critical Thinking Skills
To engage your learners in critical thinking (and to add an extra layer of fun to the science experiment!) have them make the following predictions prior to conducting the experiment:
- Which ice cube will melt the fastest?
- How much time will it take for the plain ice cube to melt?
- How much time will it take for the salty ice cube to melt?
Not only do these questions get students thinking about the experiment, but they also allow them to make mathematical comparisons to the results, engaging the “M” in STEM! Have your learners record their predictions in a table, like the one shown below.
Title: What Effect Does Salt Have on Ice?
| Ice Cube | Ice Cube + Salt | |
| it took to completely melt the ice cube (minutes) | ||
| it took to completely melt the ice cube (minutes) |
I’ll explain more about teaching students how to collect data in an organized manner in the data collection portion of this post.
Most importantly, this is a fun activity to get your kids thinking and making hypotheses. Most children are afraid of being “wrong”; this activity teaches them that being wrong is part of the fun! Taking educated guesses is what drives science forward because when we realize our answer is wrong, we can confidently move forward in the right direction! Try to foster the idea that it’s not the “right” or “wrong” answer that’s important, but rather the learning that happens as a result of the experiment.
Instructions to Conduct the Salty Ice Experiment
Follow these step-by-step instructions to visualize the effect salt has on the ice.
- Set the bowls on a level surface.
- Place an ice cube in each bowl.
- Label the first bowl as your control. This bowl will only contain an ice cube.
- Label the second bowl as your variable.
- Into the second bowl, pour one teaspoon of table salt on top of the ice cube.
- Record the time or start a stopwatch
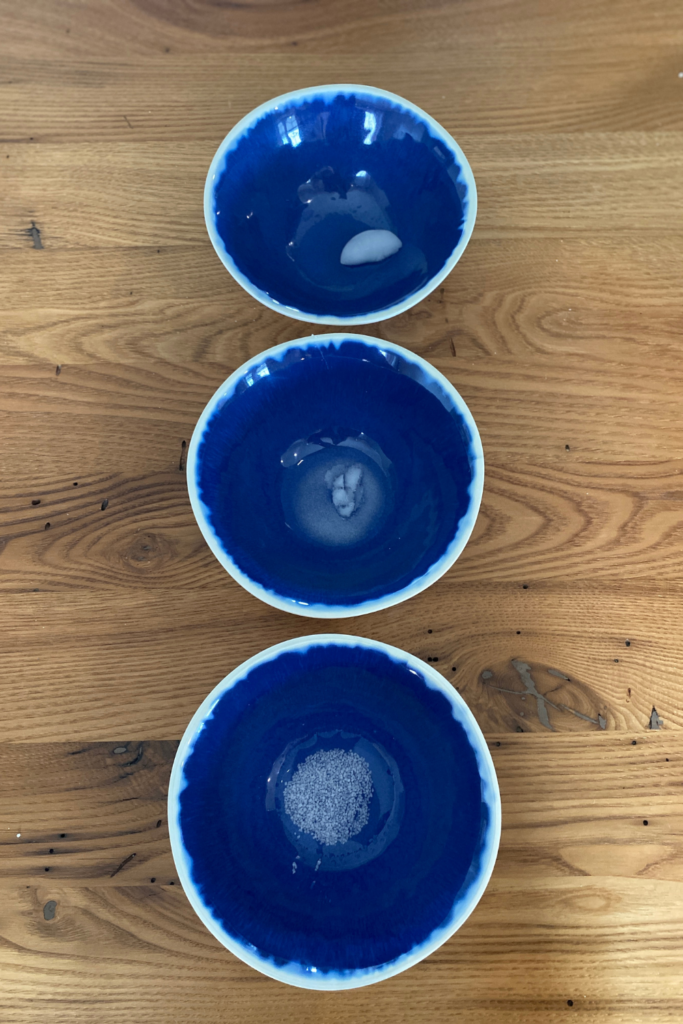
- Observe the difference in the time it takes for the two ice cubes to melt.
If you have chosen to test the effect that both fine and coarse table salt have on the ice cubes, add a step to the instructions, applying one teaspoon of the additional salt to a third ice cube.
The temperature of the surrounding air will affect the rate at which both ice cubes melt. You want to specifically focus on the difference in time between the melting rates of the ice cubes.
Simple Data Collection for the Science Experiment
This is a great activity to introduce or reinforce the importance of recording data in an organized manner. Create a simple table like the one below for your learners to write down their observations. Point out that a table must have a title, clear labels explaining what each value represents, along with the units of measurement used.
Here is an example of a table to use for the salty ice experiment:
If you have chosen to test an additional type of table salt, be sure to add an extra column to the table.

Discussion Questions for the Salty Ice Experiment
Once your learners have completed the salty ice science experiment, have them revisit their predictions and compare them to the results. Try to avoid statements such as, “Were your predictions right or wrong?” as the aim is not for them to be accurate in their assumptions, but instead to learn how to properly conduct an experiment and analyze results. Here are some prompts you can try to get them thinking:
- Which ice cube changed from solid to liquid first? Why do you think that happened?
- How does the melting time of the plain ice cube compare to your prediction? Did it melt faster or slower than you predicted?
- How does the melting time of the salted ice cube compare to your prediction? Did it melt faster or slower than you predicted?
- How can this knowledge be useful to someone that lives in a climate zone that receives ice and snow in the winter?
Depending on the age and ability level of your learners, have them calculate the numerical difference in predicted versus actual melting times of each ice cube to add an extra mathematical component to this lesson.
Environmental Implications of Using Salt to Decrease Ice Accumulation on Outdoor Surfaces
To apply what they have learned, introduce and discuss the environmental issues that arise when salt is applied in abundance to icy roadways and outdoor surfaces. You can utilize the video lesson I created with Medinah Eatman of Science Teacher Mom to guide this portion of their learning, beginning at the Nature Connection section, found at minute 15 of the virtual lesson. You’ll notice that I reference a printable in the video, which you can access for free here:
Here are the main takeaways from this section of the lesson:
- Excess salt washes into local waterways, causing problems for the plants and animals that reside there.
- Fresh water fish that reside in local waterways have hatchlings that are 30% smaller than average when exposed to higher salinity. Salinity is a value that addresses the amount of salt dissolved in water.
- Increased salinity in freshwater can kill zooplankton and phytoplankton, which are important food resources for fish, clams, snails, and insects.
- Plants can be negatively affected by increased salinity, causing them to have smaller leaves, flowers, and fruit, as well as slower stem growth.
- Large mammals like deer and moose are attracted to the salted roadways, causing in increase in collision rate with these animals during winter months.
The lesson then goes on to discuss the appropriate level of salt to use per area of ice, as well as some salt alternatives currently available to treat icy surface conditions.
Making Science Easily Accessible
Conducting simple scientific experiments like this one allows students to see that science is everywhere and doesn’t require fancy equipment to conduct investigations. Additionally, their confidence in making predictions and interpreting information will grow, strengthening their critical thinking skills.
If you try this salted ice experiment, please let me know by tagging me @thoughtfullysustainable on Instagram or Facebook , or by leaving a comment below! If you have any questions, feel free to email me!

Instructions
1. Set the bowls on a level surface. 2. Place an ice cube in each bowl. 3. Label the first bowl as your control. This bowl will only contain an ice cube. 4. Label the second bowl as your variable. 5. Into the second bowl, pour one teaspoon of table salt on top of the ice cube. 6. Record the time or start a stopwatch 7. Observe the difference in the time it takes for the two ice cubes to melt.
You can use either fine or coarse table salt for this experiment. I chose to use both to demonstrate the difference in melting time for each option. If you want to test both salt types as well, you will need 3 ice cubes and 3 bowls.
Similar Posts

How to Explore Sustainability Science Concepts with Kids

Science of Backyard Composting: Understanding the Benefits and Techniques

How to Visualize Photosynthesis: A Simple Science Experiment

Sustainability & STEM Virtual Earth Day Summit 2021

Amazing Female Scientists Picture Books for Kids

5 Ways to Reuse Plastic Bottles for Science Activities
- Pingback: How to Make Ice Cream in a Bag Using Science – Thoughtfully Sustainable
- Pingback: 5 Simple Winter Science Activities and Experiments for Kids – Raising Global Kidizens
Comments are closed.
- News/Events
- Arts and Sciences
- Design and the Arts
- Engineering
- Global Futures
- Health Solutions
- Nursing and Health Innovation
- Public Service and Community Solutions
- University College
- Thunderbird School of Global Management
- Polytechnic
- Downtown Phoenix
- Online and Extended
- Lake Havasu
- Research Park
- Washington D.C.
- Biology Bits
- Bird Finder
- Coloring Pages
- Experiments and Activities
- Games and Simulations
- Quizzes in Other Languages
- Virtual Reality (VR)
- World of Biology
- Meet Our Biologists
Listen and Watch
- PLOSable Biology
- All About Autism
- Xs and Ys: How Our Sex Is Decided
- When Blood Types Shouldn’t Mix: Rh and Pregnancy
- What Is the Menstrual Cycle?
- Understanding Intersex
- The Mysterious Case of the Missing Periods
- Summarizing Sex Traits
- Shedding Light on Endometriosis
- Periods: What Should You Expect?
- Menstruation Matters
- Investigating In Vitro Fertilization
- Introducing the IUD
- How Fast Do Embryos Grow?
- Helpful Sex Hormones
- Getting to Know the Germ Layers
- Gender versus Biological Sex: What’s the Difference?
- Gender Identities and Expression
- Focusing on Female Infertility
- Fetal Alcohol Syndrome and Pregnancy
- Ectopic Pregnancy: An Unexpected Path
- Creating Chimeras
- Confronting Human Chimerism
- Cells, Frozen in Time
- EvMed Edits
- Stories in Other Languages
- Virtual Reality
- Zoom Gallery
- Ugly Bug Galleries
- Ask a Question
- Top Questions
- Question Guidelines
- Permissions
- Information Collected
- Author and Artist Notes
- Share Ask A Biologist
- Articles & News
- Our Volunteers
- Teacher Toolbox

If you've accidentally taken a sip of sea water or had to gargle with salt water, you've probably realized that freshwater and saltwater have some pretty important differences. These differences exist not only when these waters are liquid, but also when they freeze. In this experiment, we will look at one major difference between frozen freshwater and frozen saltwater.
What You Need
- Water (tap water is fine)
- Transparent container, for example a clear water bottle with the top cut off or a drinking cup (x2)
- Food Dye (any color will work)
- Measuring cup
- Measuring spoon (teaspoon)
- Tape and marker for labeling

Before You Begin

When there is color at the bottom of the ice core, it indicates the presence of algae living within the brine channels.
As you read in the Frozen Life companion story, when sea ice forms, freshwater freezes and leaves behind a concentrated salt solution called brine. This brine is found in pockets throughout the ice. Brine pockets allow organisms that get trapped in the ice to avoid freezing and survive until the next spring. The pockets are small and isolated in winter, but in spring, as the ice begins to warm, the brine pockets get bigger and combine with other pockets to form channels which allow the organisms to move throughout the ice. You can explore the differences in channels between seasons in our channel maze.
In this experiment we are going to compare the difference between regular freshwater ice (the kind you would put in your drink) and sea ice. To do this we will create fresh and saltwater ice, then put a couple drops of dye on each type of ice and compare what happens. What do you think is going to happen? Do you think the dye will act the same in both ice types?
This should ideally be done over two days. The first four steps in the Procedure should be done on Day 1, and the remaining steps should be completed on Day 2.
Procedure (1-4 should be done ahead of time)

Step number 4, leave the containers of water in the freezer for a few hours until completely frozen.
- Using your tape and marker, label one container "water" and the other "salt water."
- In your "salt water" container, dissolve 1.5 teaspoons of salt for every cup of water (so, if you have two cups, use 3 teaspoons).
- Put the containers in a freezer (this will take at few hours to freeze, best done overnight) and keep frozen until ready to perform experiment
- Take the ice out of the containers and set them next to each other. These are going to melt and make a mess so put the containers on a tray or a sink.
- Add 5 drops of dye to the top of the freshwater ice and note what happens. (If nothing seems to happen, you can add a few more drops of dye.)
- Add 5 drops of dye to the top of the saltwater ice and note what happens.
Using your observations, decide whether your predictions were correct (what happened and did the dye act the same in both ice types?). Make a conclusion about what you think is happening based off of what you saw. Then, when you're done, you can move on to the next step.
After You Do the Experiment, Compare Your Results
The way the food coloring disperses in the ice lets you see the difference between sea and freshwater ice.
Take a look at these two ice core sections. The one on the left is ice made from fresh water, and the one on the right is ice made of salt water. What are some of the differences you notice in this image?
 and salt water ice (right) with blue food coloring added.")
Sea ice (on the right) forms brine channels which food coloring is able to penetrate. This turns the inside of the ice the same color as the dye.
The freshwater ice (on the left) is solid all the way through and has no channels. This results in food coloring pooling on top or run down the side of the ice.
Kyle Kinzler is a graduate student at Arizona State University and is working on his Masters thesis focusing on Arctic sea ice algae with Dr. Susanne Neuer. To learn more about Dr. Neuer's research, visit What Lies Beneath .
Read more about: When Water Gets Icy
View citation, bibliographic details:.
- Article: When Water Gets Icy
- Author(s): Kyle Kinzler
- Publisher: Arizona State University School of Life Sciences Ask A Biologist
- Site name: ASU - Ask A Biologist
- Date published: July 15, 2014
- Date accessed: August 8, 2024
- Link: https://askabiologist.asu.edu/experiments/when-water-gets-icy
Kyle Kinzler. (2014, July 15). When Water Gets Icy. ASU - Ask A Biologist. Retrieved August 8, 2024 from https://askabiologist.asu.edu/experiments/when-water-gets-icy
Chicago Manual of Style
Kyle Kinzler. "When Water Gets Icy". ASU - Ask A Biologist. 15 July, 2014. https://askabiologist.asu.edu/experiments/when-water-gets-icy
MLA 2017 Style
Kyle Kinzler. "When Water Gets Icy". ASU - Ask A Biologist. 15 Jul 2014. ASU - Ask A Biologist, Web. 8 Aug 2024. https://askabiologist.asu.edu/experiments/when-water-gets-icy

Download the When Water Gets Icy experiment packet .
When Water Gets Icy

Coloring Pages and Worksheets
Arctic Brine Maze
Arctic Ecosystem

Collecting Ice Cores in the Arctic
Be Part of Ask A Biologist
By volunteering, or simply sending us feedback on the site. Scientists, teachers, writers, illustrators, and translators are all important to the program. If you are interested in helping with the website we have a Volunteers page to get the process started.
Share to Google Classroom
IMAGES
COMMENTS
12. Salt Water Experiment Ocean Science. A terrific salt science experiment for pre-schoolers! An awesome kitchen science experiment to teach kids about density of salt water versus fresh water. This experiment offers great time to learn about the difference between fresh river water and salty ocean water.
SALT WATER EXPERIMENT SET UP: STEP 1: Start by filling one glass about 2/3 of the way full with water. Ask the kids what will happen if you carefully drop an egg into the glass of water. Now go ahead and do it! STEP 2: In the other glass, fill to the same height with water. Now stir in 3 tablespoons of salt.
Do this simple salt water experiment to teach kids about the respective density of salt water and fresh water. It's a fantastic kitchen science experiment that works for an ocean unit or a density science lesson. The perfect STEM activity for kids to use a controlled variable and works great as a science fair project!
A mixture of salt and water can conduct electricity. Salt can preserve food as it slows the growth of microorganisms. Salt is used to treat roads in winter as it lowers the temperature at which water freezes. Science Experiments For Kids Using Salt Lift a piece of string with ice and salt. Use salt to lift a piece of ice with string. In this ...
Add 200mL of water to a 250mL beaker. 2. Add 1 Tablespoon of salt to the water. (Technically you should probably add the salt first and then the water.) 3. Add 4 drops of food coloring. (I let them add as much food coloring as they want and whatever creative colors they want to.
Pour 1 ½ cups of water into your large container. Add ½ cup of salt to the large container and stir to dissolve some of the salt (it will not all dissolve yet). Add one more cup of water to the large container (making 2 ½ cups total) and stir to dissolve the rest of the salt. The salt should be completely dissolved before you go on to the ...
The amount of salt in the water makes your skin sting a bit when you go in. It is nearly impossible to not float due to the high density of the water. It is a strange feeling to just float so easily in water with very little effort. There is a similar feeling in the Salt Lake. Different amounts of salt in the water will create different densities.
5 jars with a flat rim (big enough to hold about a litre of water each) Instructions. Fill each jar with water. Place your egg in the first jar and watch how it sinks to the bottom. This is because the egg is more dense than the water around it. In the same jar, start adding large scoops of salt into the water.
To create salt water, we added 2 tablespoons of salt to one of the glasses and stirred until completely dissolved. Next, the students made their predictions about what they thought would happen when we added the food coloring to each glass. One of mine thought that the fresh water would be lighter in color while the salt water would be darker.
A hands-on science experiment about salt water density.This science experiment allows students to identify that liquids have different observable properties ...
Water Science Experiments. 1. Walking Water Science Experiment. This experiment is a simple yet fascinating science experiment that involves observing the capillary action of water. Children can learn a lot from this experiment about the characteristics of water and the capillary action phenomenon. It is also a great approach to promote ...
Learn all about the density of salt water! Observe a gravity-defying trick in this fascinating experiment from The Good and the Beautiful's Water and Our Wor...
Instructions: Fill the two glasses with tap water. Add about 6 tablespoons of salt in one container and stir it well with a tablespoon until the salt has completely dissolved in the water. Place one egg in each of the containers and observe which one of the eggs float in the container and which one sinks.
Materials. Transparent mini cups (2 oz.) with lids (4) Permanent marker. Tap water. Rubbing alcohol (70% isopropyl alcohol) Table salt (sodium chloride) Set of measuring spoons. Optional: ethanol or acetone (can be found in hardware stores) Optional: salt substitute (potassium chloride) or Epsom salt.
3. Spoon the water onto dark construction paper. Using a spoon or ladle, pour a little of your saltwater over a dark-colored piece of construction paper. Place this paper on a dish to avoid having it soak through to the countertop or work surface below. Now, all you need to do is wait for the water to evaporate.
This salt and ice activity will show kids the reason. This ice fishing activity also shows kids the salt melting ice effect, with added fishing fun. Another way to show kids that salted water has higher freezing point, is to put a cup of water, and a cup of salted water in the freezer, and check back regularly every 10 minutes, and keep record ...
DENSITY EXPERIMENT Create: 1. Fill both of your cups with tap water. 2. Add 2 tablespoons of salt to one of your cups. Stir the water with the spoon until the salt is all dissolved, then add a couple drops of food colouring to the same cup to help you remember which cup has salt. 3. Gently lower one egg into the cup containing only tap water.
Method: Place a few ice cubes into one glass of water. Placing ice in fresh water. Add a few drops of food coloring into the ice water. Adding green food coloring into the ice fresh water. Observing how the green food coloring disperses into the fresh water. Add several tablespoons of salt to the other glass of water and stir so it dissolves.
Learn how to make a working battery with salt water and how you can use it for a science experiment! Complete written instructions, including more background...
Follow these step-by-step instructions to visualize the effect salt has on the ice. Set the bowls on a level surface. Place an ice cube in each bowl. Label the first bowl as your control. This bowl will only contain an ice cube. Label the second bowl as your variable. Into the second bowl, pour one teaspoon of table salt on top of the ice cube.
water. Instructions: 1. Fill both cups with water about 3/4 full. 2. Add the salt to ONE cup and stir with spoon. 3. Continue to mix the salt until is is almost all dissolved. 4. Take one of the balls and make a prediction whether it will float or sink in the tap water vs. the salt water.
7 EASY SCIENCE EXPERIMENTS WITH SALT / SALT TRICKS#Salt_Experiments #Science_Experiments #Salt#Salt_Tricks #Experiments_To_Do_At_Home0:00 Simple Egg trick wi...
In your "salt water" container, dissolve 1.5 teaspoons of salt for every cup of water (so, if you have two cups, use 3 teaspoons). Take the ice out of the containers and set them next to each other. These are going to melt and make a mess so put the containers on a tray or a sink. Add 5 drops of dye to the top of the freshwater ice and note ...